Ever feel like you’re being lied to by the tech giants? Every time a new flagship phone drops, the marketing machine starts churning out these glossy, cinematic shots that look absolutely nothing like the blurry, washed-out mess sitting in your camera roll. It’s incredibly frustrating to realize that despite having a supercomputer in your pocket, you’re still struggling with how to take better phone photos that actually capture the vibe of the moment. Honestly, it feels like trying to bake a gourmet soufflé when you don’t even have the right temperature for your oven; you have all the ingredients, but the execution is just completely off.
I’m not here to sell you on a $1,200 lens attachment or a complicated editing app that requires a PhD to navigate. My goal is to strip away the hype and give you the practical, no-nonsense tweaks that actually work in the real world. I’ll be sharing the specific, low-effort adjustments I’ve learned through years of trial and error—from mastering light to understanding composition—so you can stop settling for mediocre snapshots and start capturing life’s real moments with confidence.
Table of Contents
A Smartphone Camera Settings Guide for Real Life

Think of your camera settings like the base ingredients in a sourdough recipe; if you don’t get the fundamentals right, even the fanciest toppings won’t save the loaf. Most of us just point, shoot, and hope for the best, but a quick dive into your smartphone camera settings guide can change everything. First things first: go into your settings and make sure you’re shooting at the highest resolution possible. It sounds obvious, but I’ve seen so many people accidentally leave their quality on “low” to save space, only to regret it when they try to zoom in later.
Another game-changer is mastering your exposure. You know that moment when you’re taking a photo of a sunset and everything looks like a bright, washed-out mess? Tap your screen on the brightest part of the image to lock the focus, then slide that little sun icon down to dim the light. This simple tweak is one of the most effective ways of improving mobile image quality without needing a fancy DSLR. It gives your shots that intentional, professional depth that makes people stop scrolling.
Mastering Mobile Photography Lighting Techniques Every Day

Think of lighting like the base ingredient in a sourdough starter; if it’s off, the whole recipe falls apart, no matter how much you try to fix it later. Most people make the mistake of chasing bright, harsh midday sun, but that’s a recipe for disaster—it creates those nasty, deep shadows under the eyes that make everyone look like they haven’t slept since 2015. Instead, I always aim for the “Golden Hour.” Whether you’re snapping a shot of your morning latte or a landscape on a hike, that soft, warm glow acts like a natural filter, instantly improving mobile image quality without needing a single fancy gadget.
If you find yourself stuck indoors, don’t panic. My go-to move is to ditch the overhead lights—which can make skin tones look a bit sickly—and head straight for the nearest window. Natural, indirect light is your best friend for capturing those authentic, cozy vibes. While you’re at it, try to position your subject so the light hits them from the side rather than directly from behind; this adds depth and prevents that dreaded silhouette effect. Mastering these simple mobile photography lighting techniques is honestly the quickest way to move from “accidental snapshot” to “actually looks professional.”
Five Simple Tweaks to Level Up Your Snap Game
- Stop relying on your finger to do the work and start using the volume buttons to snap your shots. It feels a little weird at first, but it gives you a much steadier grip, which is a total game-changer if you’re trying to capture a quick moment without that annoying camera shake.
- Think of your composition like seasoning a dish—you don’t want to dump everything in the pan at once. Turn on your camera’s grid lines and use the “Rule of Thirds” to place your subject off-center. It adds a bit of visual tension and makes your photos look way more intentional and less like a random snapshot.
- Clean your lens! I know, it sounds incredibly basic, but we carry our phones everywhere, and that little glass piece is constantly getting smeared with fingerprints and pocket lint. A quick wipe with a soft cloth is like putting on a fresh pair of glasses; it instantly clears up the haze and makes your images pop.
- Get low or get high to find a fresh perspective. Most people take photos from eye level, which is fine, but it can get a little boring. Try crouching down low to the ground or finding a high vantage point. It’s like changing the spice profile in a recipe—it completely transforms the vibe of the shot.
- Tap to focus and adjust your exposure manually. Don’t let the phone decide what’s important. When you tap your subject on the screen, most phones give you a little sun icon you can slide up or down. This lets you dial in the brightness perfectly so you aren’t stuck with a blown-out sky or a dark, muddy subject.
The Cheat Sheet for Better Snaps
Stop letting your phone do all the thinking; a quick dive into your settings—like turning on the grid or adjusting exposure—is like prepping your ingredients before you start cooking.
Lighting is your secret sauce, so always look for the natural glow and avoid that harsh, artificial glare whenever you can.
Don’t sweat the technical perfection; the best shots come from capturing real, unscripted moments rather than chasing a professional studio look.
## The Secret Ingredient
“Think of your phone camera like a basic sourdough starter; you don’t need the most expensive, high-tech equipment to get something incredible, you just need to understand the chemistry of light and a little bit of patience to let the moment rise.”
Morgan Bennett
Putting It All Together
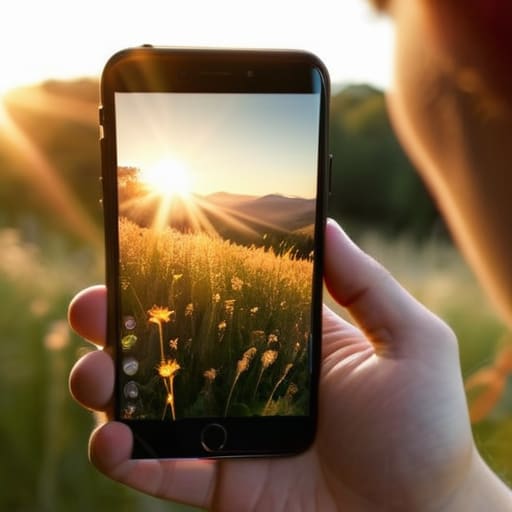
At the end of the day, taking better photos isn’t about owning the most expensive gear or having a professional studio in your pocket. It’s really just about mastering a few fundamental ingredients—like getting your settings dialed in, finding that perfect natural light, and learning how to frame your shot. Think of it like perfecting a sourdough recipe; you don’t need a chemistry degree, you just need to understand how the elements work together. Once you stop fighting your phone and start working with its strengths, you’ll find that those once-blurry, awkward snapshots transform into something much more meaningful. It’s all about small, intentional tweaks that yield massive results.
My biggest piece of advice? Don’t get so caught up in the technical “how-to” that you forget to actually live the moment you’re trying to capture. The best photos aren’t always the ones with perfect exposure or flawless composition; they are the ones that tell a story and make you feel something when you look back at them years from now. So, grab your phone, head outside, and start experimenting. Don’t be afraid to take a few duds along the way—that’s just part of the process. Go out there and start capturing the magic in your everyday life, one click at a time.
Frequently Asked Questions
Should I actually bother using portrait mode for everything, or does it just make people look fake?
Honestly? Don’t treat Portrait Mode like a heavy-handed spice; if you dump it on everything, you’ll ruin the dish. It’s great for that creamy, blurred background that makes a subject pop, but it can definitely get “uncanny valley” if the software struggles with hair or edges. Use it for intentional shots—like a close-up of a friend or a tasty latte—but stick to standard mode for landscapes or group shots to keep things looking real.
How do I stop my photos from looking grainy when I'm out at a dimly lit restaurant or a concert?
Ugh, the “grainy photo struggle”—I know it well. It’s like trying to bake a delicate soufflé in a room with no light; everything just gets messy. When you’re at a dim restaurant or a concert, your phone’s sensor is working overtime, creating that digital “noise.” My best tip? Avoid using digital zoom like the plague—it’s a recipe for disaster. Instead, try to stabilize your hands or lean against something, and if you can, tap the screen to manually adjust the exposure upward. It’s all about giving that sensor a little help!
Is there a way to edit my shots to look professional without spending hours messing around with complicated apps?
Look, I get it. You don’t want to spend your entire Sunday staring at a screen trying to master Photoshop. Think of editing like seasoning a dish: you don’t need a whole spice rack, just a pinch of salt and pepper to make the flavors pop. Stick to one or two “one-tap” apps like Snapseed or Lightroom Mobile. Focus on just three things—brightness, contrast, and saturation—and you’ll see a massive difference instantly.